Getting Started
This section will take you through the steps to create tasks and use Workflow. Workflow is available to users with Pro and Pro design user licences.
How to use with Workflow
If your version of FieldTwin Design is 7.1 or higher you will then see that the Workflow icon is now visible on the left-hand side toolbar.
There is also a youtube video going through the steps of how to create a dashboard template and how to create tasks and assign them to members of your team:
Create a Workflow Template
To get started with workflow you first have to create a template to place your tasks.
Firstly you have to have admin level access to be able to create or edit templates, this is done on the account level in FieldTwin Admin
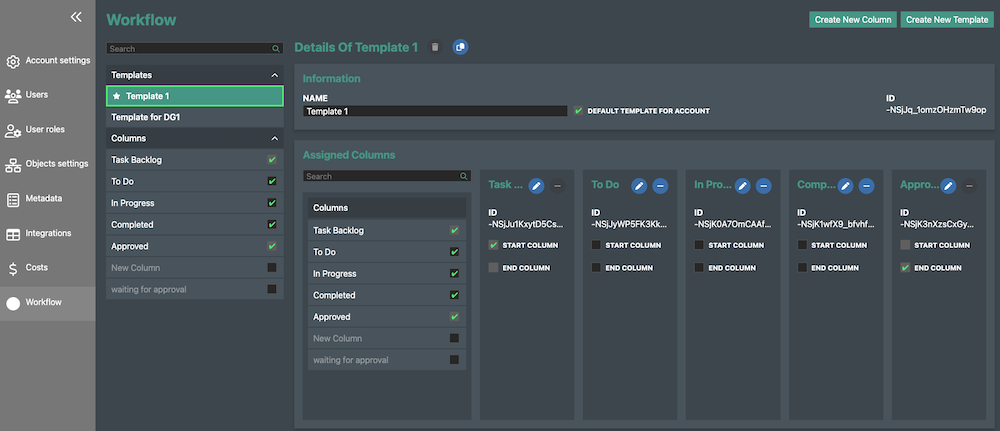
Then after entering the Workflow template setup, you can create a new template by clicking on "Create New Template" in the top right of the window. This opens a new template, where you have to provide a name and set whether this template is the default for the account you are working in.
The default template check box allows you to auto-assign the template to all your projects in this account. This can be adjusted in the project settings area.
Underneath the Name form and default template checkbox there is an area for assigned columns. These columns can be selected to become a part of your template.
The task columns can be arranged by dragging and dropping them in the correct order. The user has to select which columns will be the start and end columns. The column names can be edited by clicking on the white pencil next to the name or removed by clicking on the dash line inside the blue circle.
Project settings
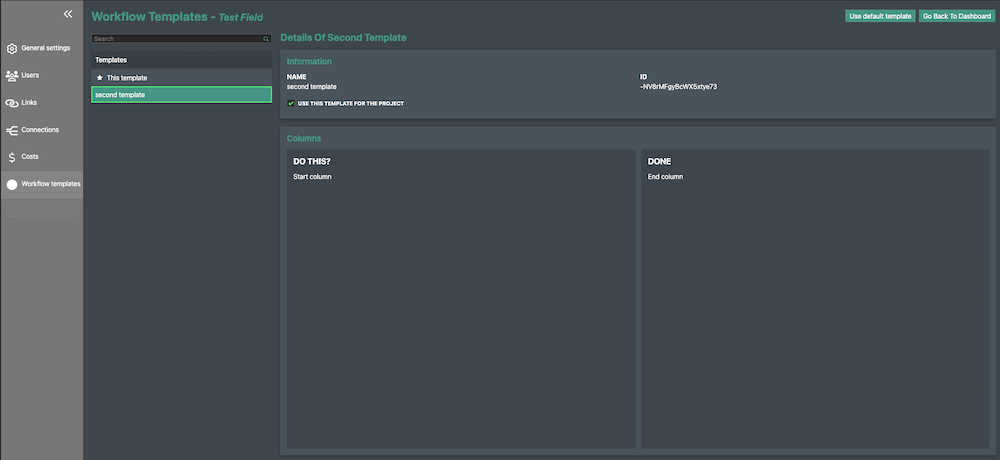
In the project settings area the workflow template can be selected for a particular project if it differs from the default set in FieldTwin Admin settings.
Here you can select a different template for your project.
Create Columns
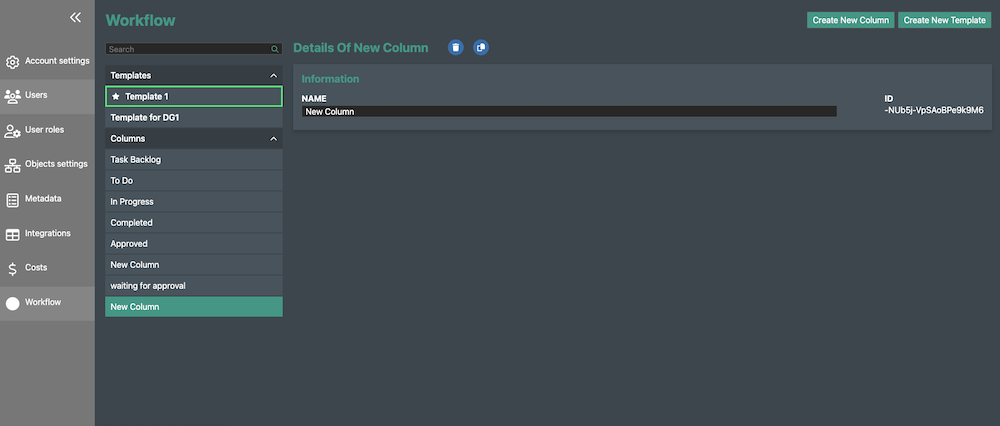
To create a column this can be done by clicking on the "Create New Column button" next to the create new template button.
Once clicked a new column is created and the user can assign the correct name to this column. After this point the column will be available for selection in either an existing or a new Workflow template
Creating a Task
Creating a task can be done either inside the dashboard of a particular account, project or sub project.
This can be done both from the dashboard or inside a FieldTwin project itself.
Create a Task inside the dashboard
This is created by clicking on the "Create task button" underneath the calendar view
Create a Task inside a project
Inside a project, a task can be created either by right clicking on an asset and selecting "Create Task".
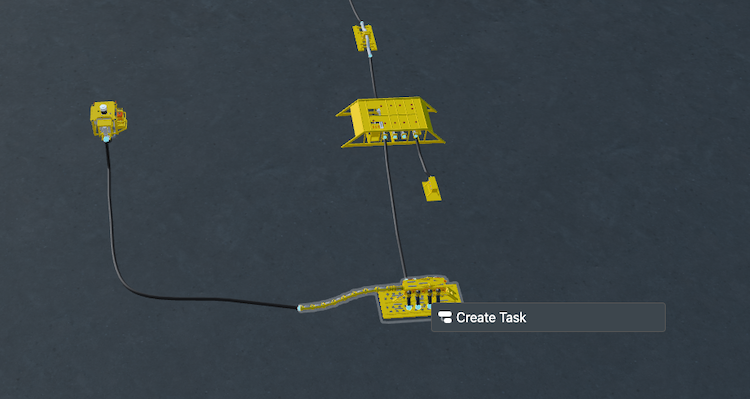
Or inside the "Project View" on the left and selecting an object and right clicking to select "Create Task"

When the "Create Task" button is selected a window will open, Within this window several options and menus are available for the user to select from. The user also has the ability to attach files to the task.
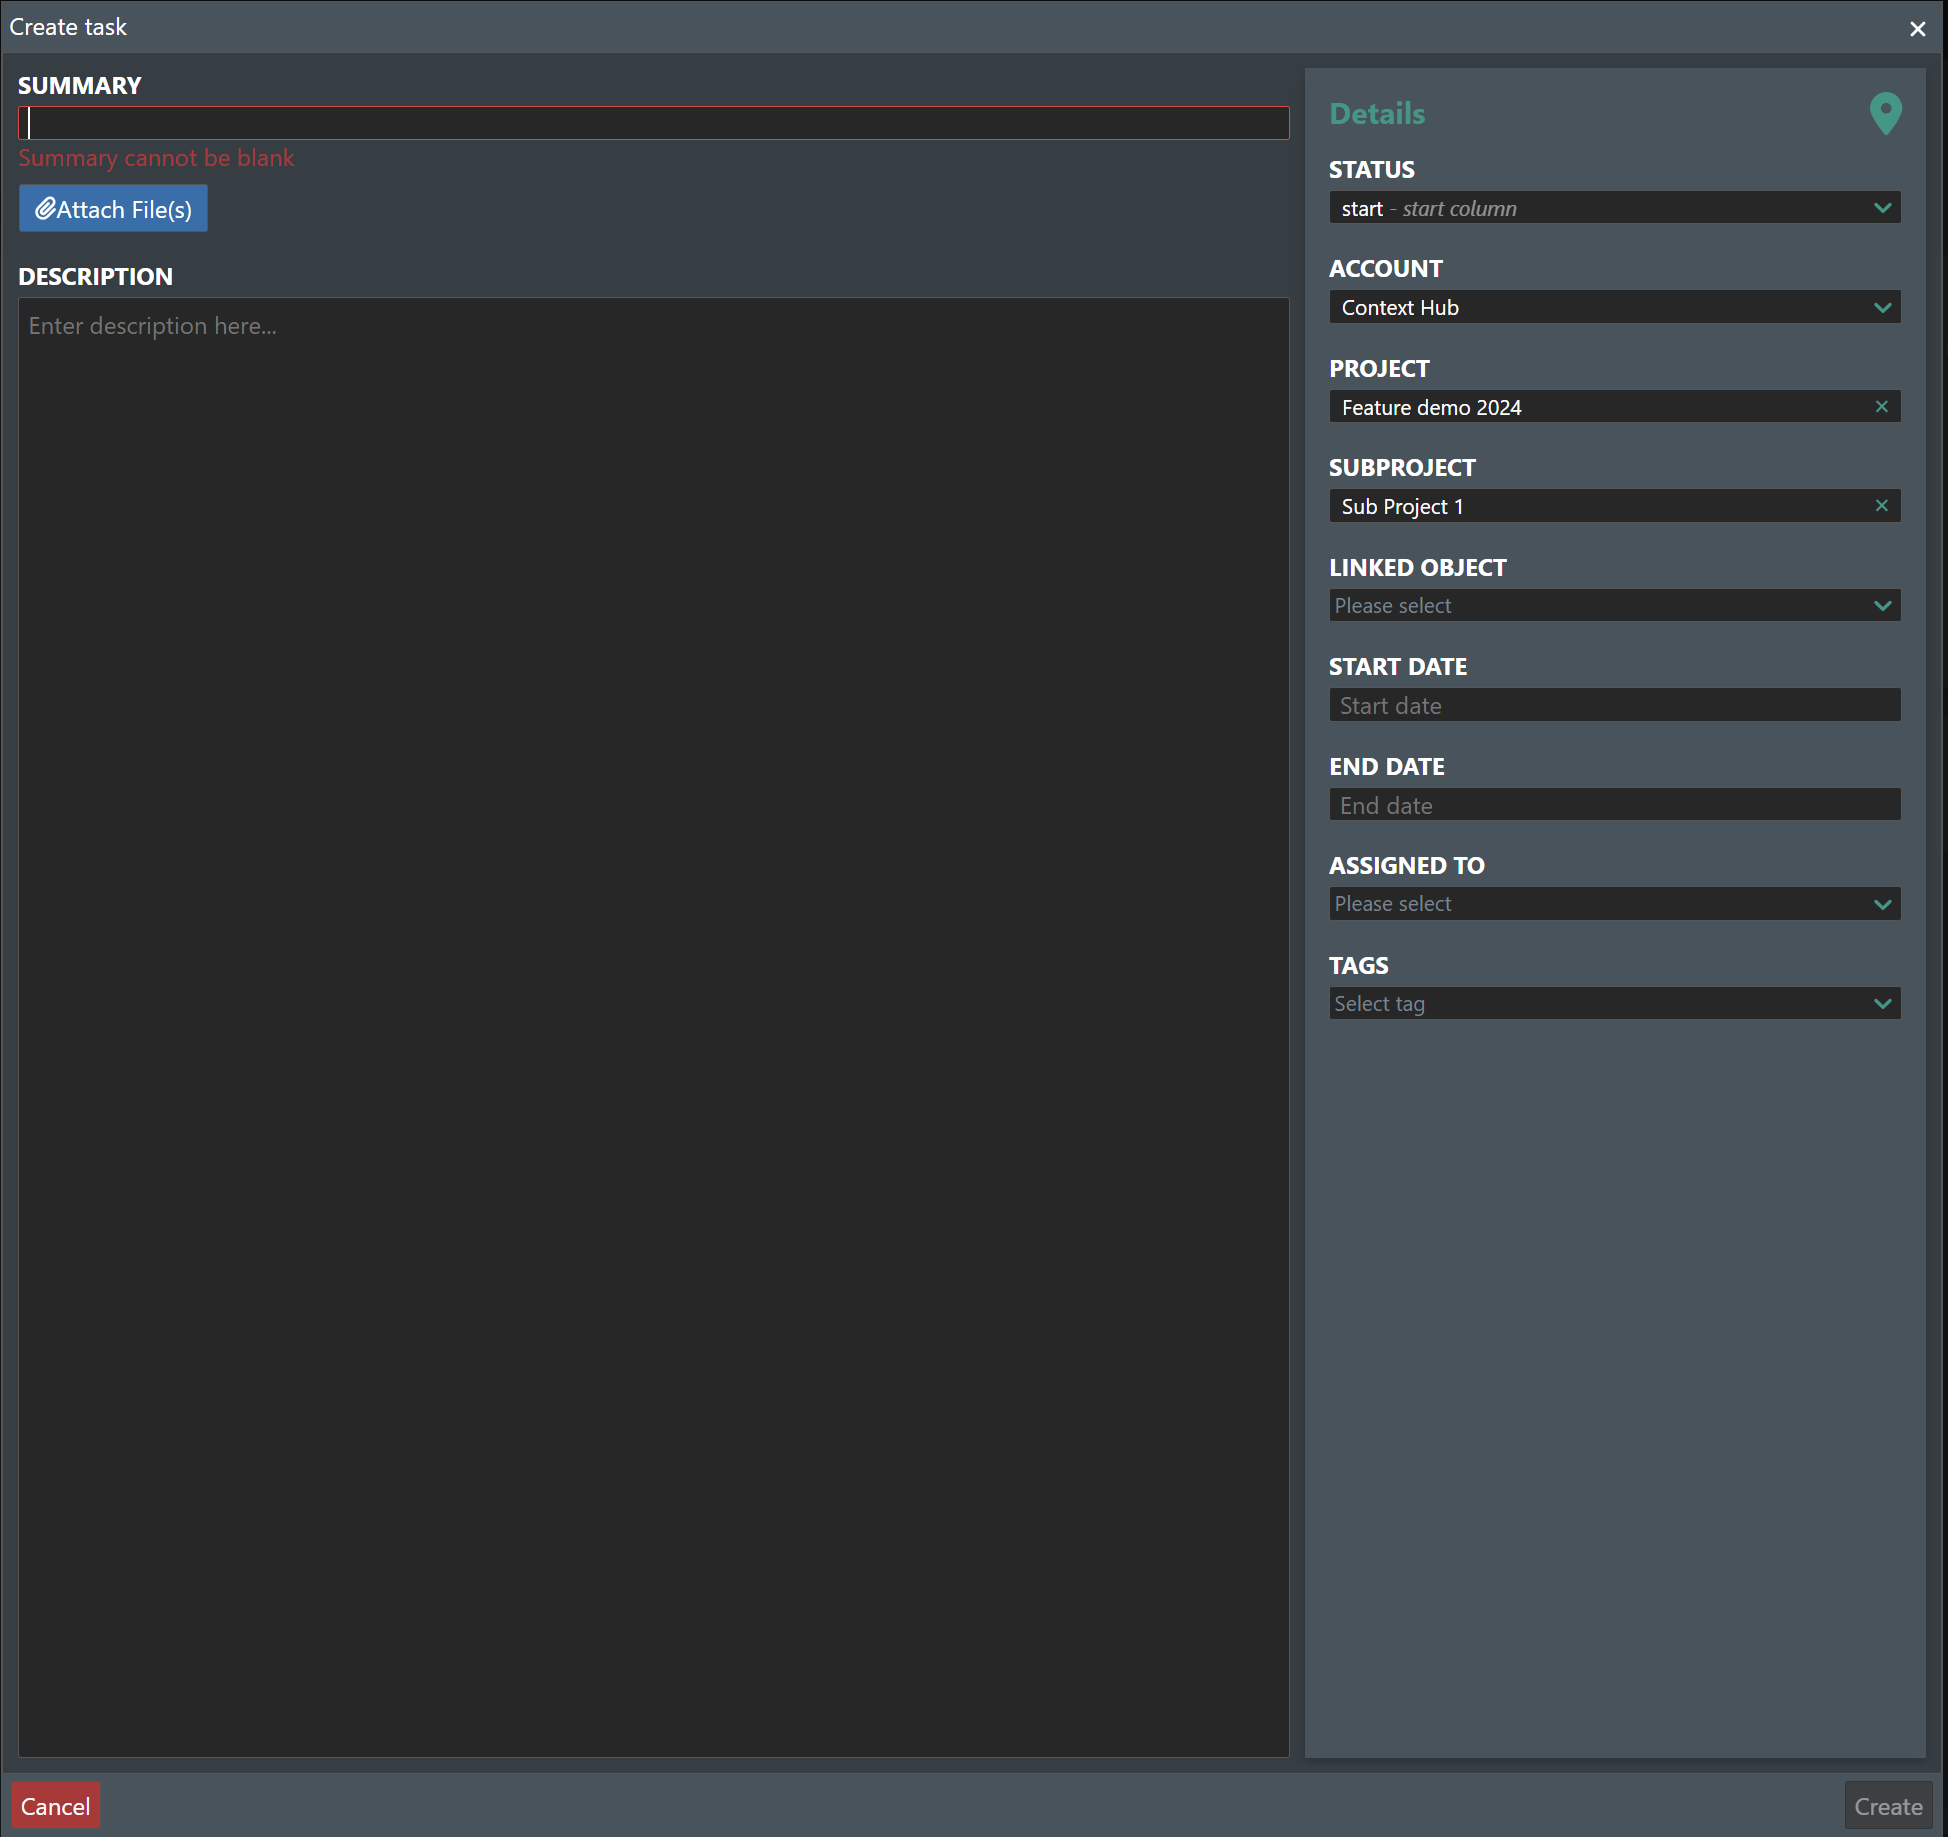
Summary and description
The summary or title of a task has to be filled in, in order for the task to be created.
A description can also be provided, giving more information about the task that has been created.
Attach Files
Files, documents, pictures and other files can be attached to your task. Simply click on the attach files button and follow the instructions in the dialog box that will open allowing you to upload files from your device.
Dropdown choices
-
Status - Select which column based on your template that you should set as the task status e.g. Start, In Progress, etc.
-
Account - This dropdown provides a list of accounts which are available to the user based on their access level, By just selecting the account and leaving the project and sub project fields empty the task will be placed on the account level only, and will be visible in the account level Global dashboard.
-
Project - The project that the user selects will be from the available projects inside the account. If the project is selected and the sub project is left blank, the task will be placed on the project level and will be visible in the account and project level global dashboards.
-
Sub project - The Sub project selected from the dropdown will be from the list of available sub projects inside the project selected above. If a sub project is selected the task will be visible in the account dashboard, project dashboard and the sub project global dashboard.
-
Linked Object - The linked object field lists all of the available objects inside the selected sub project. This includes assets, connections, shapes and well-bores. The user can select either one or multiple assets.
-
Start Date - The start date is the date for the project to be started.
-
End Date - The end date is the due date for the project to be completed. When the task is due in the same week as the current date a red symbol is visible in the global tree view and also in the calendar of the dashboard.
-
Assigned To - The tasks can be assigned to users that are listed under the account and or the project, depending on the level the task is placed. So if the Account field is only filled in the task can be assigned to any of the users with Pro or pro design level access within the Account. If a project is selected, the user can select from users who have been assigned to the project.
-
Tags - Tags can be created and assigned to the task, if a tag is not available or visible in the dropdown list. A new tag can be created by typing the tag name and pressing enter. This tag will then become available to all other users in workflow.
Press Create to create the teask or Cancel to abort.
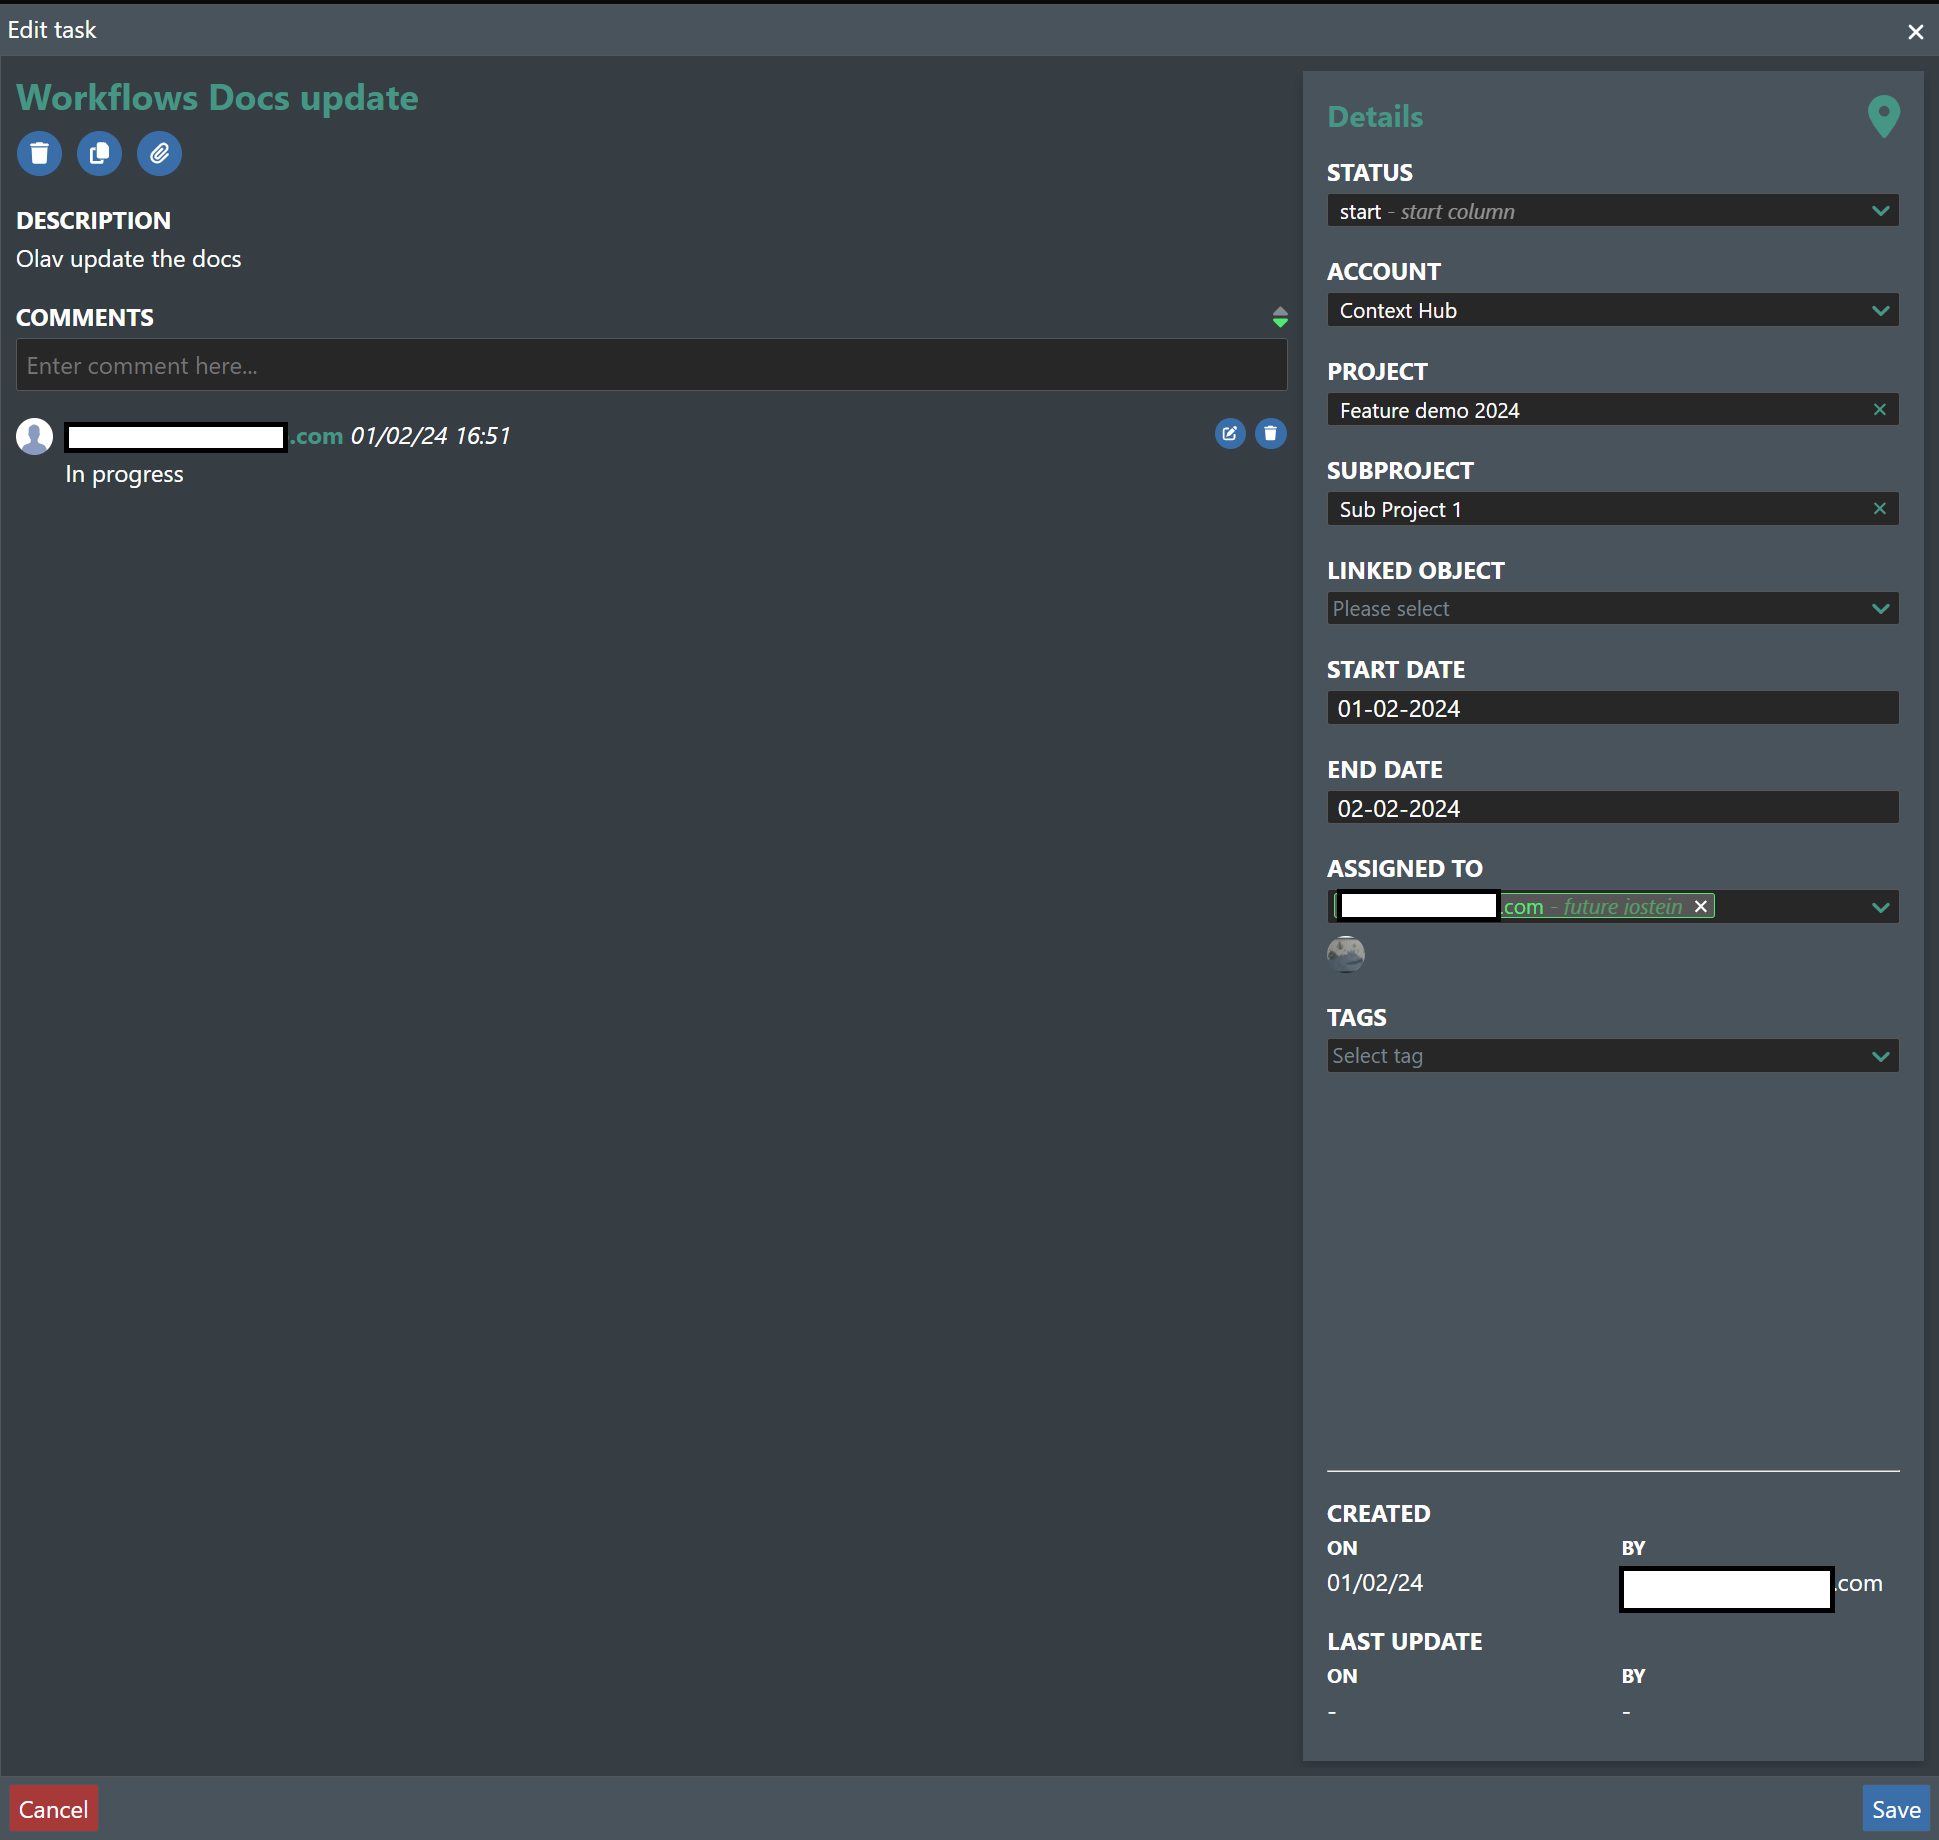
Task Editing/Commenting
Tasks can be edited or comments can be added to the task so that communication can be exchanged and updates given to the task creator and other members of the team. Documents can also be uploaded and new objects, tags and team members can be assigned to the task.
Tasks can be edited both from the personal dashboard, global dashboards and inside the projects themselves.
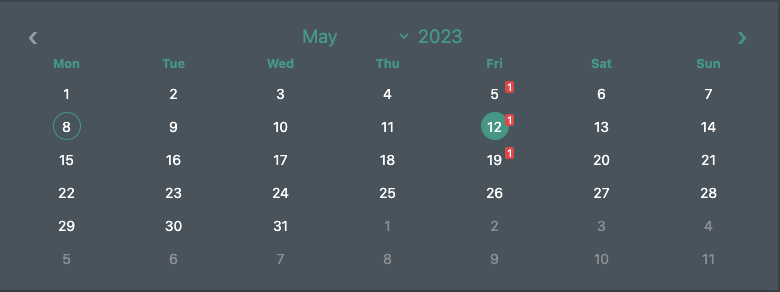
Calendar
The calender always provides an informational overview of the current date and the dates where tasks are due. The latter you see indicated with the Red task counter on the end date if present.
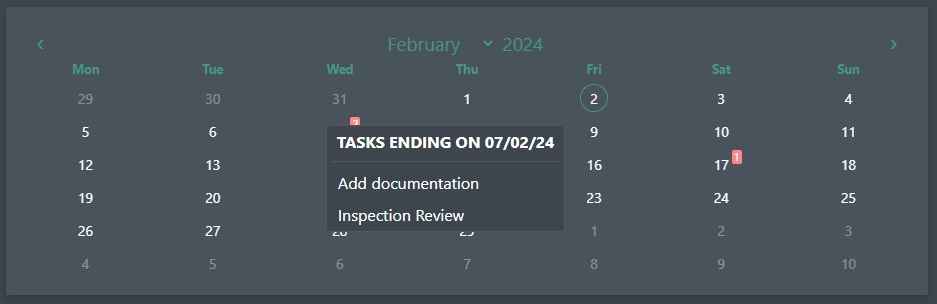
You can click on the date in the calender with task indication on them to display a list of the task names directly in the calendar as shown above. You can then click on the task directly from there to display it!
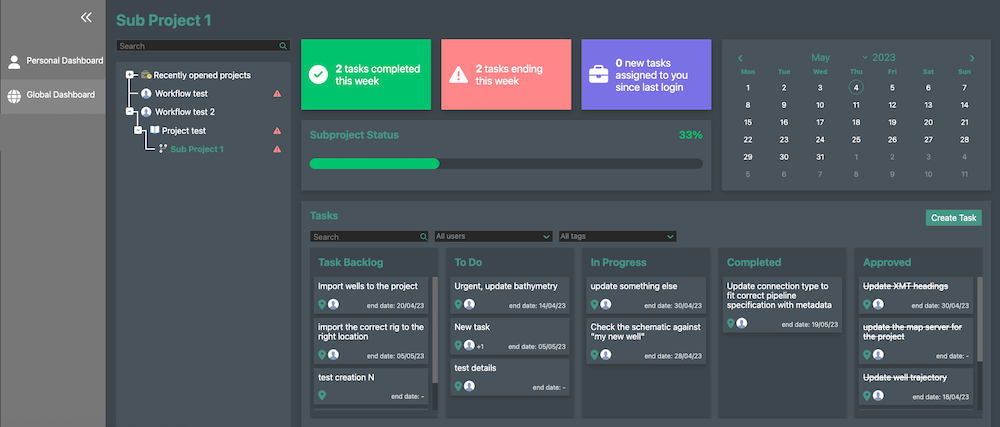
Global Dashboard
The Global dashboard allows the user to view all the tasks relating to an account, a project and a sub project.
- Widgets - The dashboard contains 3 widgets, showing the number of tasks completed this week, the tasks due to be completed this week and the number of new tasks assigned to you.
- Calendar - There is a calendar view which shows when tasks are due and the number of tasks.
- Status - The status is related to the percentage of tasks completed out of the total number of tasks in the board.
- Task Board - The task board contains the columns that were created in the workflow template
Personal Dashboard
The Personal dashboard is specific to the user and allows the user to view all the tasks assigned to them across all accounts, projects and sub projects.
- Widgets - The dashboard contains 4 widgets, showing the number of tasks completed this week, the tasks due to be completed this week and the number of new tasks assigned to you. Also there is a widget to show how many projects the user is a member of.
- Calendar - There is a calendar view which shows when tasks are due and the number of tasks.
- Status - The status is related to the percentage of tasks completed out of the total number of tasks in the board.
- Your Tasks - The area with your tasks contains all the tasks that have been assigned to you. There are several columns available to help you navigate your tasks.
The ID of the task is the first column, this UID allows tasks to be chosen using the api and brought into other applications.
Other details are also available, such as:
- The Summary of the task.
- Who created the task.
- When the task was created.
- The last time the task was updated.
- The tasks end date.
- The Account, Project and subproject the task has been assigned.
- The Status of the task and if the task is completed
- Tasks can also be edited by clicking on the pencil and can also be deleted.
